물리 기반 포스 피드백 [실험 중]
이전 예제에서는 평면이나 구와 같은 원시적인 오브젝트를 렌더링했는데, 포스 피드백 계산이 단순하기 때문에 수작업으로 코딩되었습니다. 오브젝트가 더 복잡해지면 수동 계산은 번거롭고 복잡해집니다. SOFA, IMSTK, CHAI3D와 같은 피직스 엔진은 햅틱 애플리케이션에 고도로 최적화되어 1000Hz 이상의 주파수에서 실행할 수 있습니다. 사실적인 햅틱 시뮬레이션을 만들 수 있지만, Unity와의 통합이 필요합니다. Unity에는 내장된 물리 엔진이 빌트인되어 있어 간단한 시뮬레이션에 사용할 수 있습니다. 이 문서에서는 햅틱 씬을 빌드하고 물리 엔진을 햅틱 시뮬레이션에 통합하는 방법과 키네마틱 및 비키네마틱 오브젝트를 사용하여 햅틱 시뮬레이션에 물리 엔진을 통합하는 방법을 설명합니다.
소개
Unity에는 키네마틱과 비키네마틱 두 가지 유형의 리지드바디가 있습니다. 키네마틱 오브젝트는 이전 예제에서 커서와 같은 스크립트로 제어됩니다. 이와 대조적으로 비동역학 바디는 충돌과 그로 인한 힘에 의해 제어됩니다. 문제는 사용자와 비운동성 객체 간에 힘 데이터를 교환하는 데 있습니다. 힘의 입력이나 출력 모두 직접 측정할 수 없기 때문입니다. 직접 측정할 수 없기 때문입니다.
이 문제를 해결하기 위해 컨피규러블 조인트를 사용하여 스프링과 댐퍼로 구성된 가상 연결로 키네마틱 오브젝트와 비키네마틱 오브젝트를 스프링과 댐퍼로 구성된 가상 링크로 연결합니다. 사실상, 비운동 오브젝트가 다른 비운동 오브젝트와 충돌하면 움직이지 못하지만 운동하는 물체는 계속 움직이면서 스프링을 늘리고 힘을 생성합니다. 이렇게 생성된 힘을 직접 사용하여 오브젝트를 렌더링할 수 있습니다.
장면 설정
이를 구현하기 위해서는 두 개의 객체를 함께 사용해야 합니다:
- 커서 오브젝트(키네마틱) - 디바이스의 커서 위치와 일치하는 커서 오브젝트입니다.
- 피직스 이펙터 (비키네마틱)로, 고정 조인트를 통해 커서 오브젝트에 고정 조인트를 통해 연결됩니다.
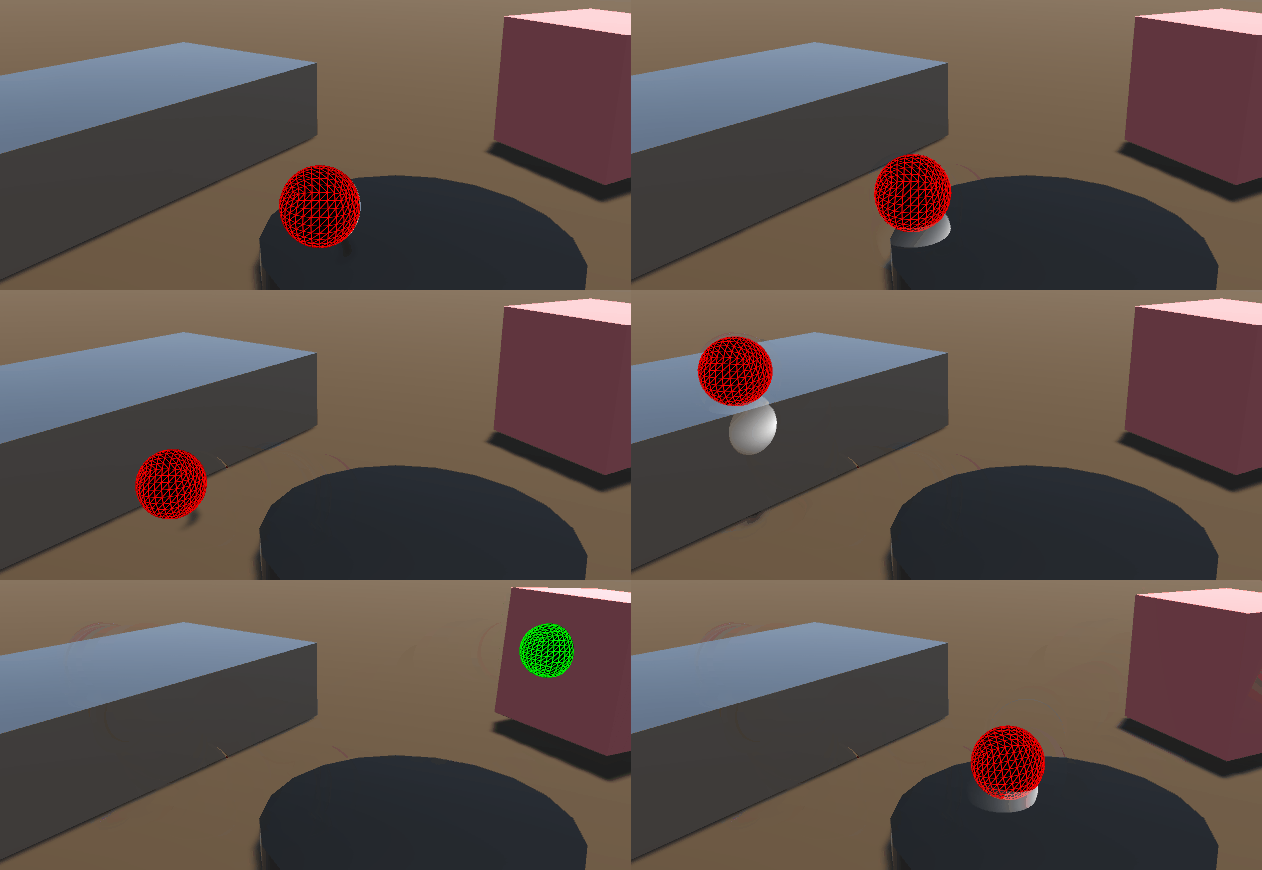
디바이스에서 렌더링되는 힘은 이 두 오브젝트 사이의 거리에 상대적입니다. 즉, 피직스이펙터 오브젝트가 씬의 다른 오브젝트에 의해 가려지면 커서 오브젝트와의 거리에 비례하는 커서 오브젝트로부터의 거리에 비례하는 힘이 생성됩니다.
- 시작하기 가이드에 설명된 대로 햅틱 스레드 및 커서를 추가합니다.
- 워크스페이스 크기 조정 및 배치에 표시된 대로 워크스페이스를 만듭니다.
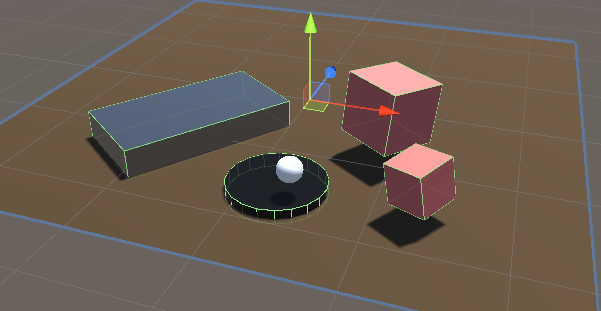
- 햅틱 워크스페이스 아래에 물리 이펙터라는 구체를 생성하고 라는 구체를 생성합니다.
- 씬에 콜라이더를 사용하여 다양한 3D 오브젝트를 추가합니다.
- 강체가 있고 중력이 활성화된 큐브와 질량이
1000.

선택 사항: 기본 제공
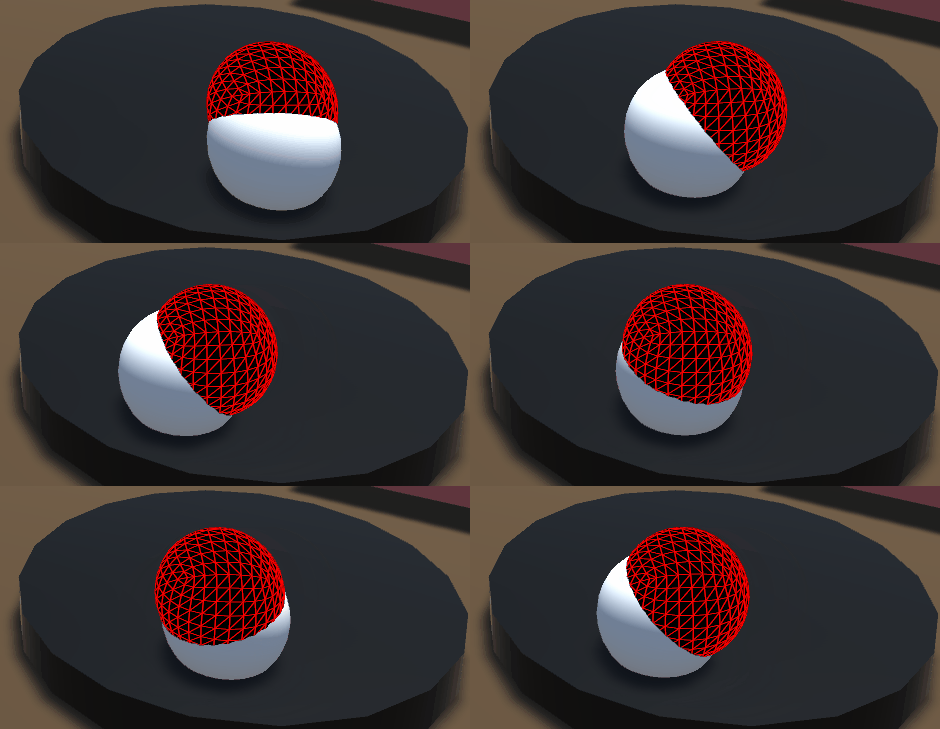
SpatialMappingWideframe자료의 피직스 이펙터 를 클릭하면 구를 표면을 가로질러 움직일 때 구가 어떻게 회전하는지 확인할 수 있습니다. 마찰로 인해 구가 어떻게 회전하는지 확인합니다.
간단한 물리 햅틱 루프
새 C# 스크립트 호출 SimplePhysicsHapticEffector.cs 를
피직스 이펙터 게임 오브젝트입니다. 이 스크립트의 소스는 아래에 나와 있습니다.
using Haply.HardwareAPI.Unity;
using UnityEngine;

public class SimplePhysicsHapticEffector : MonoBehaviour
{
    // Thread safe scene data
    private struct AdditionalData
    {
        public Vector3 physicEffectorPosition;
    }

    public bool forceEnabled;
    [Range(0, 800)]
    public float stiffness = 400f;
    [Range(0, 3)]
    public float damping = 1;

    private HapticThread m_hapticThread;

    private void Awake ()
    {
        // Find the HapticThread object before the first FixedUpdate() call.
        m_hapticThread = FindObjectOfType<HapticThread>();

        // Create the physics link between the physic effector and the device cursor
        AttachCursor( m_hapticThread.avatar.gameObject );
    }

    private void OnEnable ()
    {
        // Run haptic loop with AdditionalData method to get initial values
        if (m_hapticThread.isInitialized)
            m_hapticThread.Run(ForceCalculation, GetAdditionalData());
        else
            m_hapticThread.onInitialized.AddListener(() => m_hapticThread.Run(ForceCalculation, GetAdditionalData()) );
    }

    private void FixedUpdate () =>
        // Update AdditionalData
        m_hapticThread.SetAdditionalData( GetAdditionalData() );

    // Attach the current physics effector to the device end-effector with a fixed joint
    private void AttachCursor (GameObject cursor)
    {
        // Add a kinematic rigidbody to the cursor.
        var rbCursor = cursor.GetComponent<Rigidbody>();
        if ( !rbCursor )
        {
            rbCursor = cursor.AddComponent<Rigidbody>();
            rbCursor.useGravity = false;
            rbCursor.isKinematic = true;
        }

        // Add a non-kinematic rigidbody to self
        if ( !gameObject.GetComponent<Rigidbody>() )
        {
            var rb = gameObject.AddComponent<Rigidbody>();
            rb.useGravity = false;
        }

        // Connect self to the cursor rigidbody
        if ( !gameObject.GetComponent<FixedJoint>() )
        {
            var joint = gameObject.AddComponent<FixedJoint>();
            joint.connectedBody = rbCursor;
        }
    }

    // Method used by HapticThread.Run(ForceCalculation) and HapticThread.GetAdditionalData()
    // to synchronize the physic effector position information between the physics thread and the haptic thread.
    private AdditionalData GetAdditionalData ()
    {
        AdditionalData additionalData;
        additionalData.physicEffectorPosition = transform.localPosition;
        return additionalData;
    }

    // Calculate the force to apply based on the distance between the two effectors.
    private Vector3 ForceCalculation ( in Vector3 position, in Vector3 velocity, in AdditionalData additionalData )
    {
        if ( !forceEnabled )
        {
            return Vector3.zero;
        }
        var force = additionalData.physicEffectorPosition - position;
        force *= stiffness;
        force -= velocity * damping;
        return force;
    }
}
이 설정을 사용하면 장면에서 각 오브젝트를 가장 잘 느낄 수 있으며, 무거운 오브젝트일수록 더 많은 저항을 제공합니다.

문제:
- 마찰/끌림의 느낌은 Unity 물리 엔진과 햅틱 사이의 업데이트 주파수(60Hz~120Hz)와 햅틱 사이의 업데이트 스레드(~1000Hz)의 업데이트 주기 차이로 인해 발생합니다. 이 차이는 물리 이펙터가 항상 커서보다 커서의 실제 위치보다 뒤처지게 되며, 이로 인해 물리 이펙터의 힘은 연속적이지 않고 단계 함수와 유사한 힘이 발생합니다.
- 움직이는 물체에는 실제 햅틱이 없습니다.
솔루션:
- 의 값을 줄입니다.
ProjectSettings.FixedTimestep에 가까운0.001로 가능한 한. 이 변경 사항은 복잡한 장면의 성능에 상당한 영향을 미칩니다. 장면에 상당한 영향을 미칠 것입니다. - 충돌이 발생할 때만 힘을 가합니다 (다음 예제 참조).
- 타사 물리/햅틱 엔진(예: TOIA, SOFA 등)을 유니티 물리 엔진과 유니티의 물리 엔진과 햅틱 루프 사이의 미들웨어를 사용하여 더 높은 빈도로 접촉점을 시뮬레이션합니다.
고급 물리 햅틱 루프
이 예에서는 그렇게 하겠습니다:
-
충돌 감지 출력을 사용하여 이펙터가 오브젝트와 접촉하지 않을 때 마찰/끌림 느낌을 느낌을 피하려면 이펙터가 오브젝트와 접촉하지 않을 때 충돌 감지 출력을 사용합니다.
-
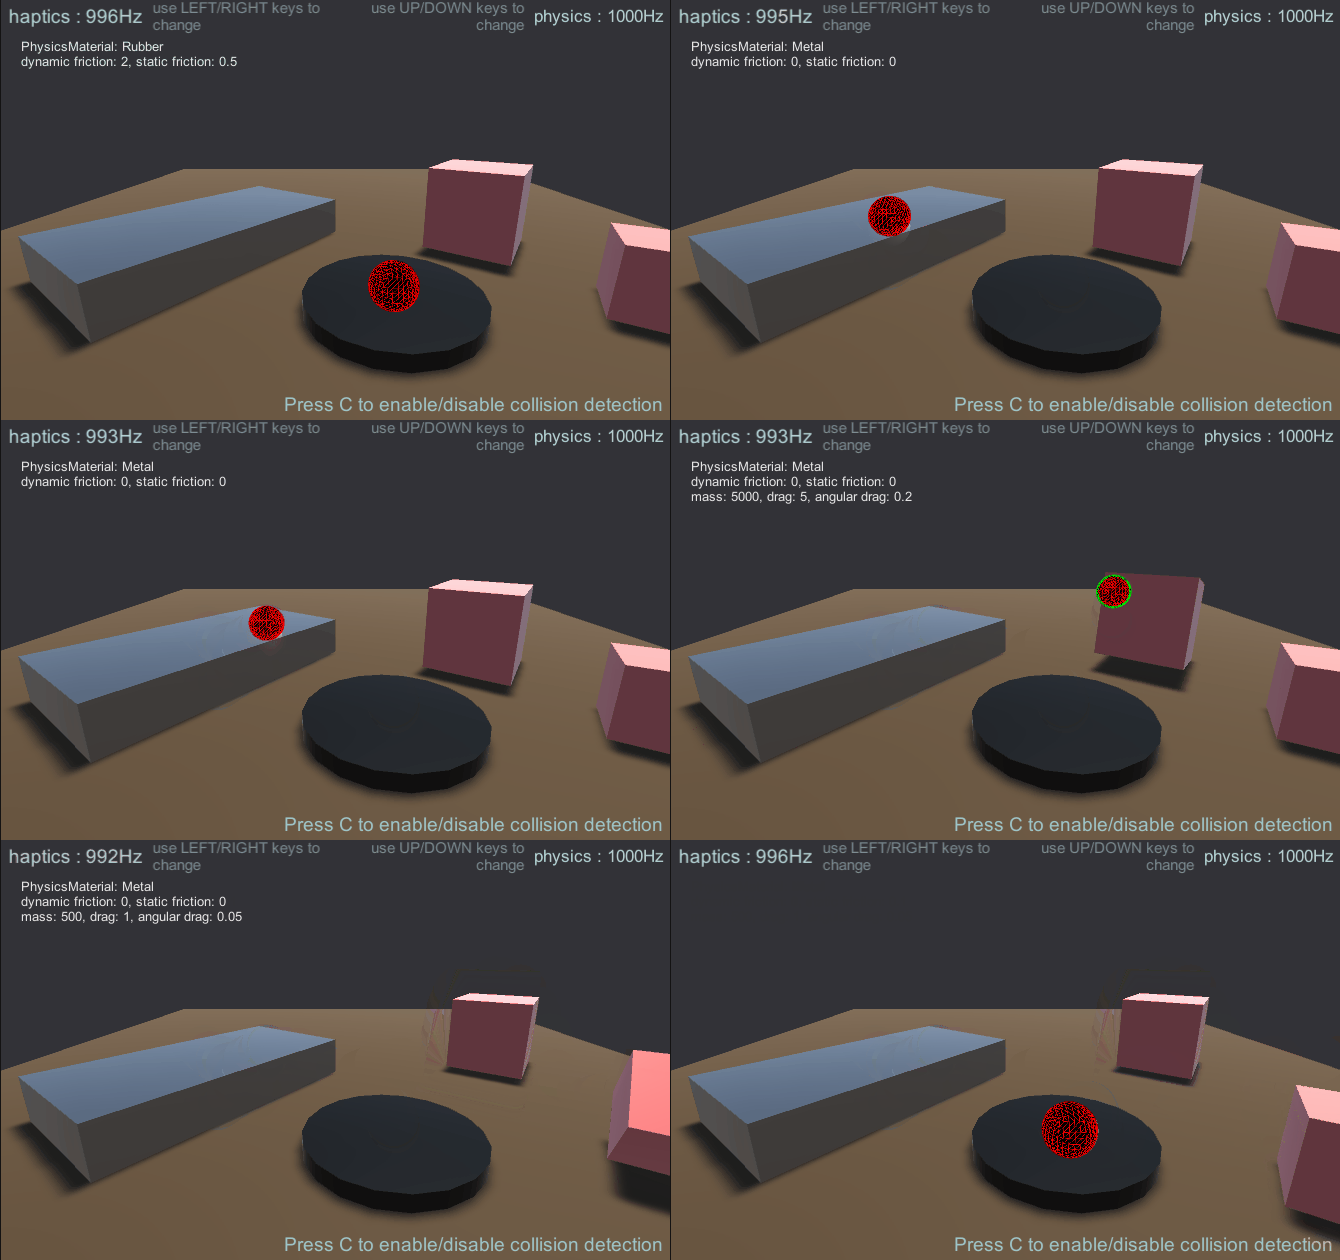
리미트, 스프링, 댐퍼가 있는 컨피규러블 조인트는 고정 조인트가 아닌 두 이펙터를 연결합니다. 이렇게 하면 Unity의 피직스 머티리얼을 사용하여 씬의 오브젝트에 다양한 마찰 값을 설정하고 씬의 오브젝트에 다양한 마찰 값을 설정하고 포스 피드백을 통해 움직이는 오브젝트의 질량을 느낄 수 있습니다.
에서 피직스 이펙터 게임 개체에서
단순화된 물리 햅틱 이펙터 스크립트 구성 요소에 의해 C# 스크립트
호출 AdvancedPhysicsHapticEffector.cs
using Haply.HardwareAPI.Unity;
using System.Collections.Generic;
using UnityEngine;

public class AdvancedPhysicsHapticEffector : MonoBehaviour
{
    /// Thread-safe scene data
    private struct AdditionalData
    {
        public Vector3 physicEffectorPosition;
        public bool isTouching;
    }

    public bool forceEnabled;

    [Range(0, 800)]
    public float stiffness = 400f;
    [Range(0, 3)]
    public float damping = 1;

    private HapticThread m_hapticThread;

    // Apply forces only when we're colliding with an object which prevents feeling
    // friction/drag while moving through the air.
    public bool collisionDetection = true;

    private List<Collider> m_Touched = new();

    private void Awake ()
    {
        // Find the HapticThread object before the first FixedUpdate() call.
        m_hapticThread = FindObjectOfType<HapticThread>();

        // Create the physics link between the physic effector and the device cursor
        AttachCursor( m_hapticThread.avatar.gameObject );
    }

    private void OnEnable ()
    {
        // Run haptic loop with AdditionalData method to get initial values
        if (m_hapticThread.isInitialized)
            m_hapticThread.Run(ForceCalculation, GetAdditionalData());
        else
            m_hapticThread.onInitialized.AddListener(() => m_hapticThread.Run(ForceCalculation, GetAdditionalData()) );
    }

    private void FixedUpdate () =>
        // Update AdditionalData with the latest physics data.
        m_hapticThread.SetAdditionalData( GetAdditionalData() );

    /// Attach the current physics effector to the device end-effector with a joint
    private void AttachCursor (GameObject cursor)
    {
        // Add a kinematic rigidbody to the cursor.
        var rbCursor = cursor.AddComponent<Rigidbody>();
        rbCursor.useGravity = false;
        rbCursor.isKinematic = true;

        // Add a non-kinematic rigidbody to self.
        var rb = gameObject.AddComponent<Rigidbody>();
        rb.useGravity = false;
        rb.drag = 80f; // stabilize spring connection

        // Connect self with the cursor rigidbody via a spring/damper joint and a locked rotation.
        var joint = gameObject.AddComponent<ConfigurableJoint>();
        joint.connectedBody = rbCursor;
        joint.anchor = joint.connectedAnchor = Vector3.zero;
        joint.axis = joint.secondaryAxis = Vector3.zero;

        // Limit linear movements.
        joint.xMotion = joint.yMotion = joint.zMotion = ConfigurableJointMotion.Limited;

        // Configure the limit, spring and damper
        joint.linearLimit = new SoftJointLimit()
        {
            limit = 0.001f
        };
        joint.linearLimitSpring = new SoftJointLimitSpring()
        {
            spring = 500000f,
            damper = 10000f
        };

        // Lock the rotation to prevent the sphere from rolling due to friction with the material which will
        // improve the force-feedback feeling.
        joint.angularXMotion = joint.angularYMotion = joint.angularZMotion = ConfigurableJointMotion.Locked;


        // Set the first collider which handles collisions with other game objects.
        var sphereCollider = gameObject.GetComponents<SphereCollider>();
        sphereCollider.material = new PhysicMaterial {
                dynamicFriction = 0,
                staticFriction = 0
        };


        // Set the second collider as a trigger that is a bit larger than our first collider. It will be used to
        // detect when our effector is moving away from an object it was touching.
        var trigger = gameObject.AddComponent<SphereCollider>();
        trigger.isTrigger = true;
        trigger.radius = sphereCollider.radius * 1.08f;
    }

    // Method used by HapticThread.Run(ForceCalculation) and HapticThread.GetAdditionalData()
    // to synchronize the physic effector position information between the physics thread and the haptic thread
    private AdditionalData GetAdditionalData ()
    {
        AdditionalData additionalData;
        additionalData.physicEffectorPosition = transform.localPosition;
        additionalData.isTouching = collisionDetection && m_Touched.Count > 0;
        return additionalData;
    }

    // Calculate the force to apply based on the distance between the two effectors
    private Vector3 ForceCalculation ( in Vector3 position, in AdditionalData additionalData )
    {
        if ( !forceEnabled || (collisionDetection && !additionalData.isTouching) )
        {
            // Don't compute forces if there are no collisions which prevents feeling drag/friction while moving through air.
            return Vector3.zero;
        }
        var force = additionalData.physicEffectorPosition - position;
        force *= stiffness;
        return force;
    }

    private void OnCollisionEnter ( Collision collision )
    {
        if ( forceEnabled && collisionDetection && !m_Touched.Contains( collision.collider ) )
        {
            // Store the object that our effector is touching.
            m_Touched.Add( collision.collider );
        }
    }

    private void OnTriggerExit ( Collider other )
    {
        if ( forceEnabled && collisionDetection && m_Touched.Contains( other ) )
        {
            // Remove the object when our effector moves away from it.
            m_Touched.Remove( other );
        }
    }

}
소스 파일
이 예제에서 사용된 최종 씬과 모든 관련 파일은 Unity의 패키지 관리자에서 임포트할 수 있습니다.
추가 기능:
- 단순 물리 이펙터와 고급 물리 이펙터 중 하나를 선택하려면
1또는2키입니다. - 제어 햅틱 프레임 속도 를 사용하여
LEFT/RIGHT키를 입력합니다. - 제어 물리 프레임 속도 를 사용하여
UP/DOWN키를 입력합니다. - 토글 충돌 감지 를 사용하여
C키입니다. - 토글 강제 피드백 를 사용하여
SPACE키입니다. - 질량이다른 정적 및 동적 오브젝트가 있는 준비된 씬 및 PhysicsMaterials.
- 터치한 오브젝트의 프로퍼티 (정적/동적 마찰, 질량, 드래그...)

